User Management Guide for Administrators
User Management. We have recently made some enhancements to our User Management screens. Whether you’re new to User Management, or you’re already a System Administrator on your Organisation's account…
User Management
We have recently made some enhancements to our User Management screens. Whether you’re new to User Management, or you’re already a System Administrator on your Organisation's account, the new screens will provide additional functionality, and make user management even easier.
To access the User Management screens, go to Menu > Administration > Users. Here you’ll find the full user list, as well as separate sections to help you manage access to the Meetings, Plans & Registers, and Resources areas.

ALL USERS
In the All Users list you can view details such as each username, email address, their overall role on the system (User or System Admin), the modules they have access to, and their last login date.
Click on the More Options (ellipsis) icon to the right of each user for additional functions:
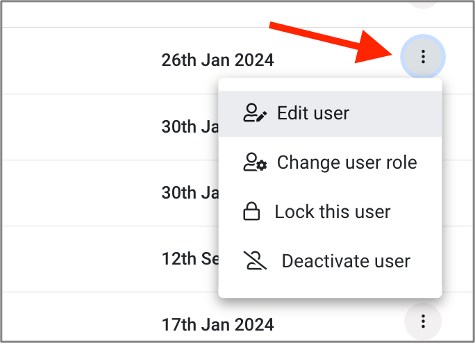
Edit User
Click on this option to open the full User Profile and update any of the general user details or preferences as needed.
Change User Role
This option allows you to change a standard access User to a System Admin (or vice versa).
Important: The System Admin role should only be provided to those users who need to make organisation-wide changes like Multi-Factor Authentication Settings, adding/removing users etc, via the Administration menu. For module-specific roles, please see the relevant section of this guide.
Lock this User
Choose this option if you would like to temporarily restrict this user’s access to the platform. The user can be unlocked again in the same way. Note: Locking a user’s access will not free up a license – if the user no longer needs access to the platform at all, choose Deactivate User instead.
Deactivate User
Choose this option when a user no longer needs access to any part of their account, for example if they leave the Organisation. This option means a license will become available to allocate to another user. If you ever need to, you can reactivate a previous user by adding them again; if you use the same email address as they had before, you’ll see a message asking if you would like to reactivate their old user profile.
CREATE A NEW USER
To create a new user on the system, click Create New User at the top of right of your All Users list.

In the next screen, add the user details and upload an image (optional), then select Create User.
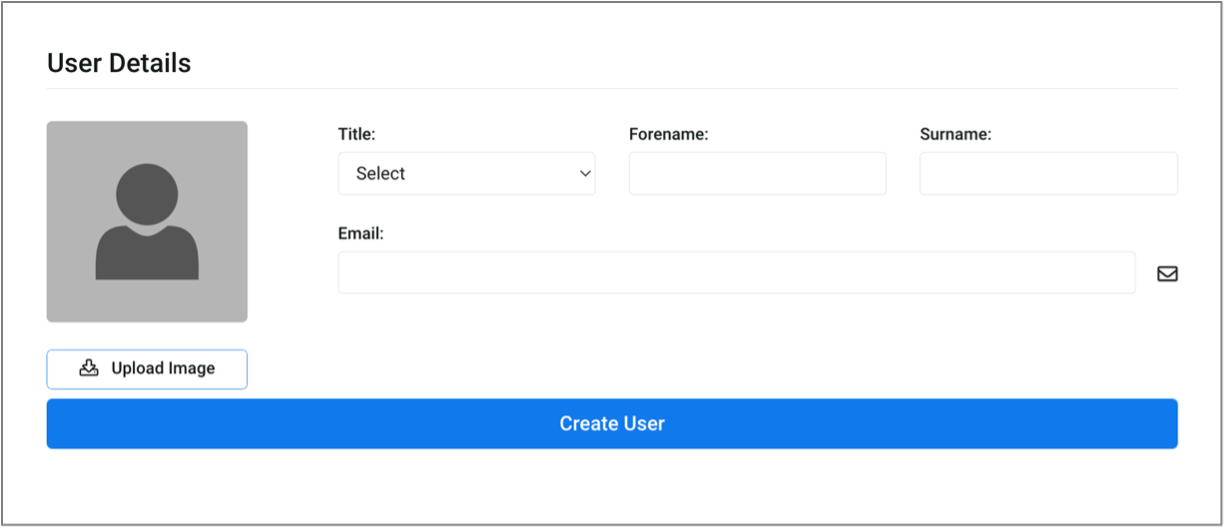
Your new user will now be available in the All Users list. The default role is User.
Remember: The System Admin role should only be provided to those users who need to make organisation-wide changes like Multi-Factor Authentication Settings, adding/removing users etc, via the Administration menu. For module-specific roles, please see the relevant section of this guide.
You can now add the new user to each of the modules they’ll need and set their access preferences. This is done via the Meetings, Plans & Registers, and Resources drop-down options on the left. When you create a new user, they’ll be added to the Meetings module by default – if they won’t need to be included in Meetings, see the next section for instructions on blocking access.
MEETINGS
Click on the Meetings dropdown to open your Meetings user list. This list shows all users who have access to the Meetings section of the platform. On the left, you’ll see each of the Committees listed.
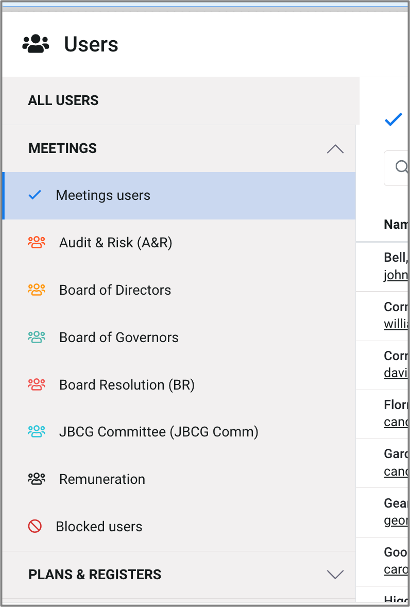
Adding Users
In the Meetings Users list, search for the user you want to add to the Meetings module. You can do this by scrolling through the list or typing the user’s name into the search field at the top of the list. If they’re not already in the list, click Add Users.

Click into the ‘search all users’ field and choose the user you’d like to add from the list or start typing the user’s name and select it once populated. This is a multi-select list, so you can add multiple users at one time if you need to. Click Add Users to include the user(s) in the Meetings module.
Changing the User Role
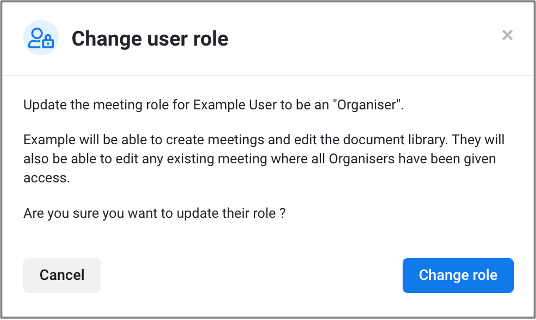
When a new Meetings user is added, the default role is Attendee. If they will need to be able to set up and edit meetings, change the role to Organiser. To do this, click on the More Options (ellipsis) icon to the right of the user’s name in the Meetings Users list:
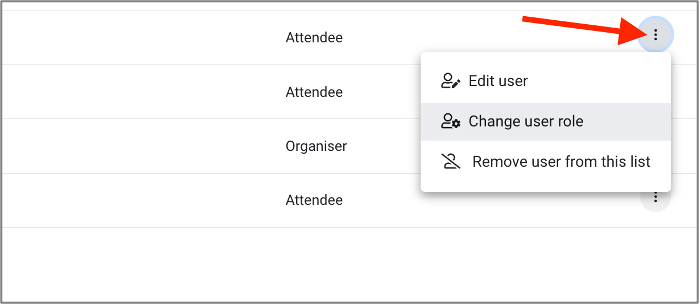
A prompt will ask you to confirm whether you want to proceed with changing the user role. Click Change Role if you’re happy with the change. Note: The Organiser role should only be applied to those who need to create and edit meetings.
Managing Committee Members
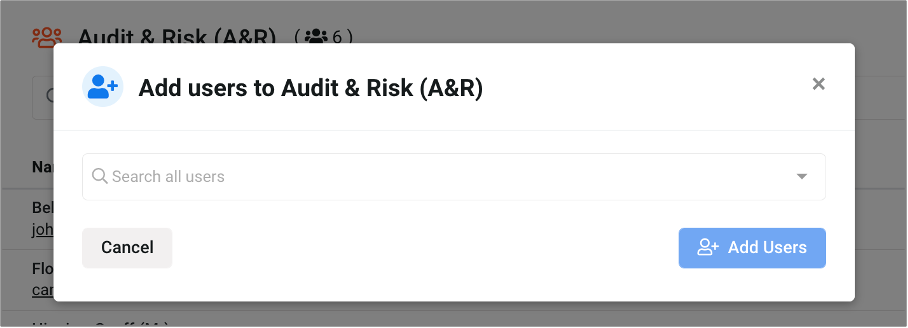
Select a Committee to add/remove users. To include a user in the Committee, click Add Users.

Click on the ‘search all users’ field and choose the user you’d like to add from the list or start typing the user’s name and select it once populated. This is a multi-select list, so you can add multiple users at one time. Click Add Users to include the user(s) in that Committee.
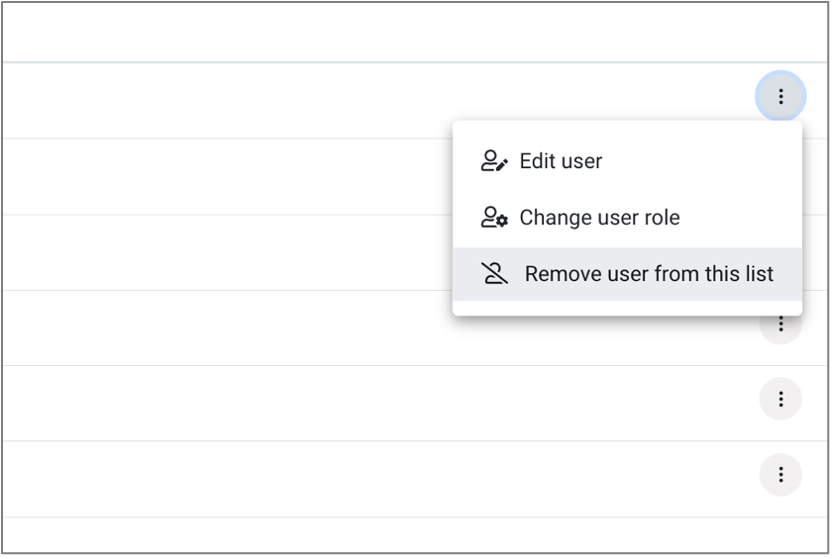
To remove a user from a Committee, click on the more options (ellipsis) icon, then select Remove user from this list. You’ll see a prompt to ask whether you’re sure.
Blocking access to Meetings
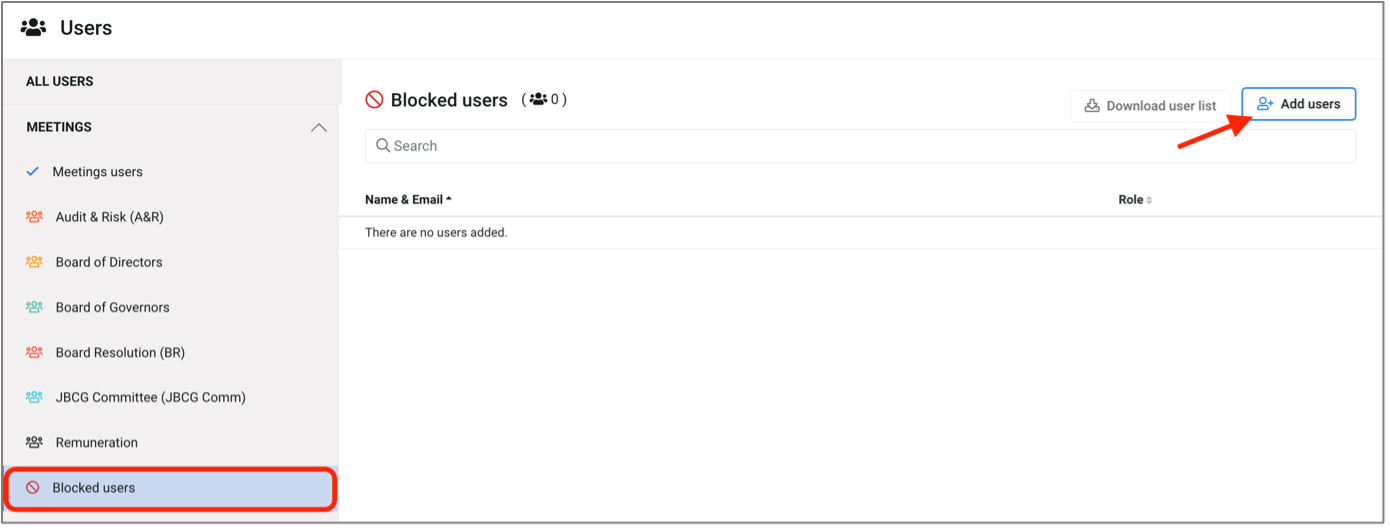
To block a user’s access to the Meetings module, you can do this from either the Meetings all users list, or via the Meetings Blocked Users list.
In the Meetings Users list, click on the more options (ellipsis) icon to the right of the user and select Remove User from this list. The user will now show in the Meetings Blocked Users list.

From the Meetings Blocked Users list, click Add Users. Click on the ‘search all users’ field and choose the user from the list or start typing the user’s name and select it once populated. This is a multi-select list, so you can choose multiple users at one time. Click Add Users to block the user(s) from the Meetings module.
PLANS & REGISTERS
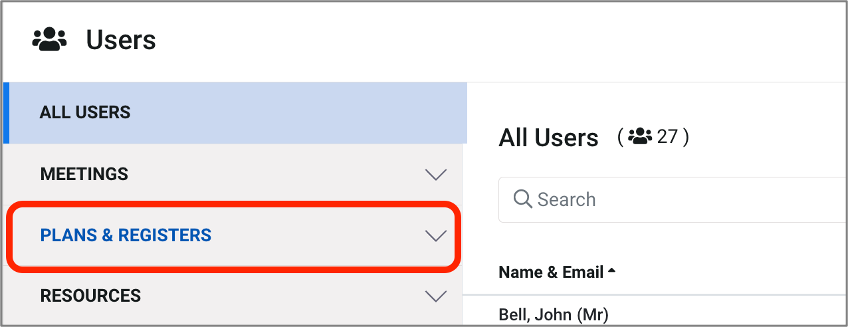
Click on the Plans & Registers dropdown to view a list of all the Risk Registers and Goal Plans configured for your Organisation.
Managing Board Users
Click on a Plan or Register to view and manage the users on a board. Users will only have access to the Plans & Registers you include them on.
To give users access to the board, click Add Users at the top right of the list.

Click on the ‘search all users’ field and choose the user you’d like to add from the list or start typing the user’s name and select it once populated. This is a multi-select list, so you can add multiple users at one time. Click Add Users to give the user(s) access to the board.
The default access level is User – a standard User can edit items where they are assigned as an Owner or Editor and will typically have read-only access to the Risks/Objectives they do not own.
In the board User List, click on the More Options (ellipsis) icon on the right of a user to carry out the following:
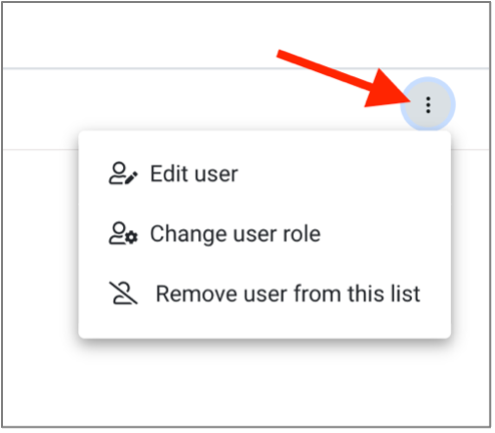
Edit User
Click on this option to open the full User Profile and update any of the general user details or preferences as needed.
Change User Role
This option allows you to change a standard access User to an Admin (or vice versa) on that board.
Important: The Admin role should only be applied if you want that user to be able to make changes across the entire plan/register, regardless of ownership. The Admin role is typically reserved for those who need to be oversee the plan/register.
Remove User from this list
Choose this option if you would like to remove the User’s access to that board. Note: before doing this, you should ensure that any items owned by that user have been reassigned. Otherwise, they will remain in the Name filter dropdown.
RESOURCES
In this section, you can manage users’ access to the Resources Library. Click on the Main Library under the Resources header:

Here you’ll see a list of the users who currently have access to the Resources Library.
Note: Permissions (where applicable) for the folders within the Resources Library are managed directly within the folder structure. This section of the User Management menu is for general access to the module only.
Providing Access
To allow a user access to the Resources Library, click Add Users:

Click on the ‘search all users’ field and choose the user you’d like to add from the list or start typing the user’s name and select it once populated. This is a multi-select list, so you can add multiple users at one time. Click Add Users to give the user(s) access to the Resources Library.
Removing/Blocking Access
If the user already has access to the Resources Library and you want to remove their access to the module altogether, click on the More Options (ellipsis) icon to the right of that user in the Main Library list. Select Remove user from this list:
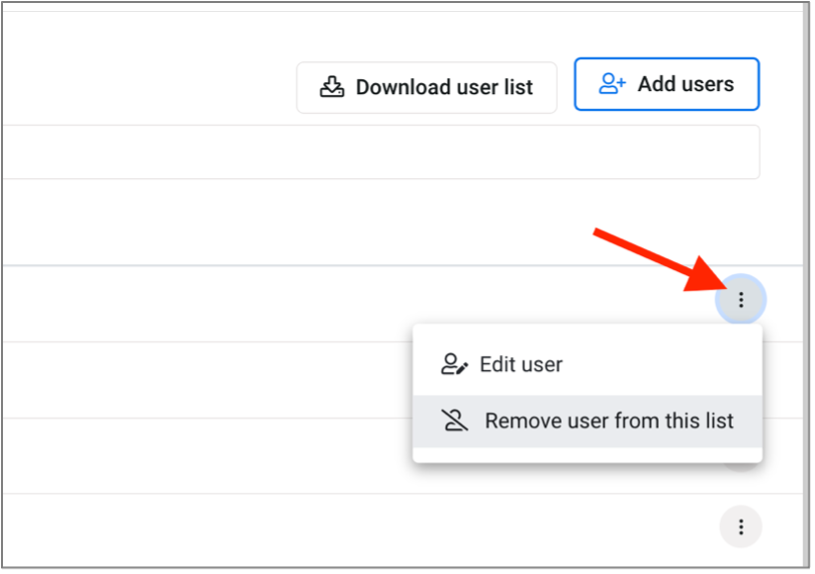
The user will now show in the Blocked Users list.
Alternatively, you can add the user directly into the Blocked Users list. Click on Blocked Users under the Resources header, then select Add Users:

Click on the ‘search all users’ field and choose the user from the list or start typing the user’s name and select it once populated. This is a multi-select list, so you can add multiple users at one time. Click Add Users to add the user to the Blocked User list.
Was this article useful?
User Management for Organisations using SSO