Information on the Resources Library & folder permissions.
Resources Library & Folder Permissions. Introduction. The Resources Library enables Organisers to build a folder structure, upload documents or useful links, and manage access to those. Whilst meetin…
Resources Library & Folder Permissions
Introduction
The Resources Library enables Organisers to build a folder structure, upload documents or useful links, and manage access to those. Whilst meeting-specific documents are typically uploaded to meeting packs, the Resources Library can be used to host supplementary information such as Policy documents, Annual Reports, Governance Handbooks, etc.
In Edit Mode, an Organiser can:
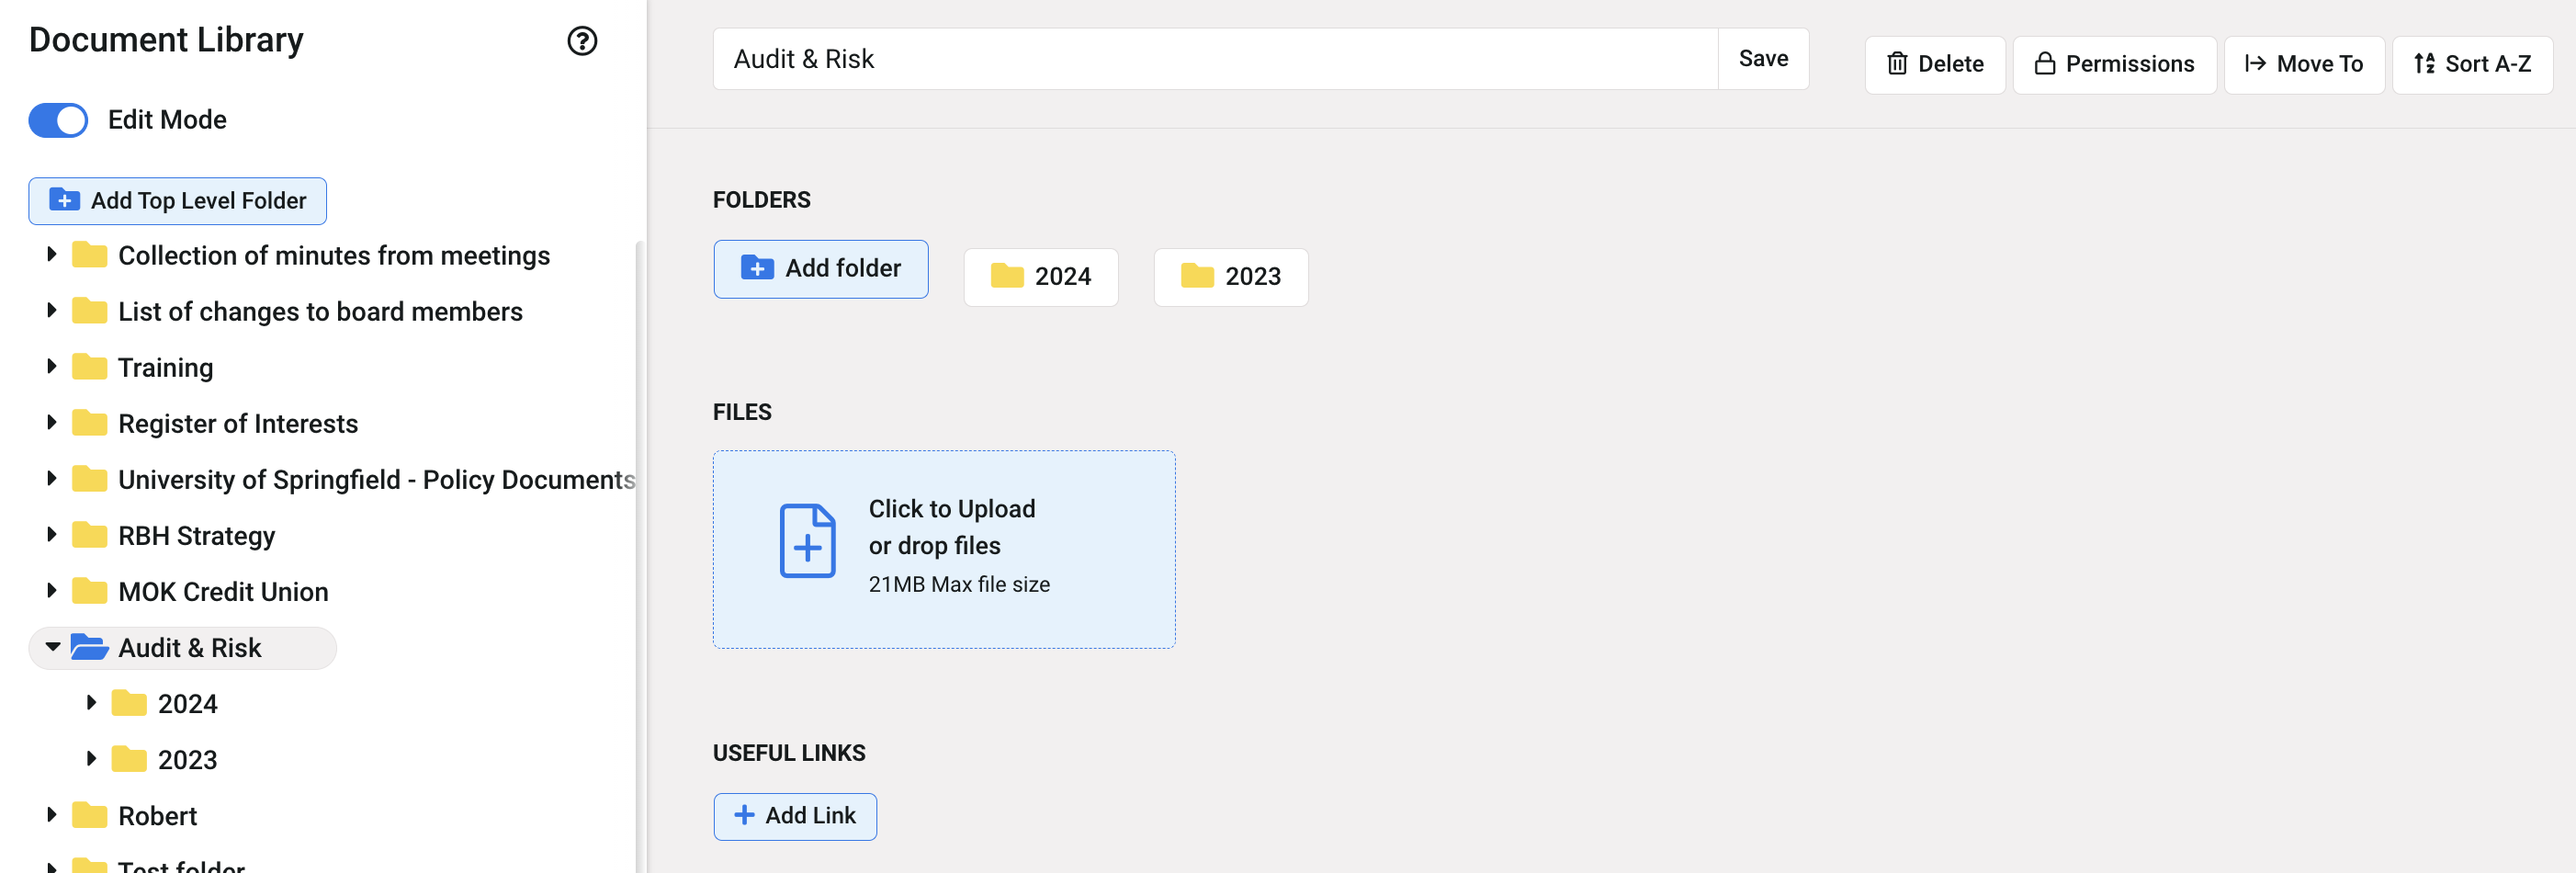
- Add a Top Level Folder - in Edit Mode, a top-level folder can be created in the left-hand sidebar. You can also create a sub-folder from within the folder you're clicked into.
- Drag & Drop folders to change the order of the folder structure.
- Upload Documents or Add a Link - select the 'Click to Upload' or 'Add Link' button to choose documents or add a useful link you'd like to add to the Library. Note: you can select multiple files at a time.
- Manage Permissions - Permissions can be applied to folders within the Resources Library, in order to control access. If no permissions have been applied, a folder and its contents are available to any users with access to the Resources module.Note: Permissions applied on a top-level folder will apply to all of its sub-folders, so the permissions don't need to be repeated on every sub-folder.

How to apply folder permissions
Click on the Edit Mode slider to open up the Resources Library configuration mode.
Open the folder you want to apply permissions on.
Click on the Permissions icon.
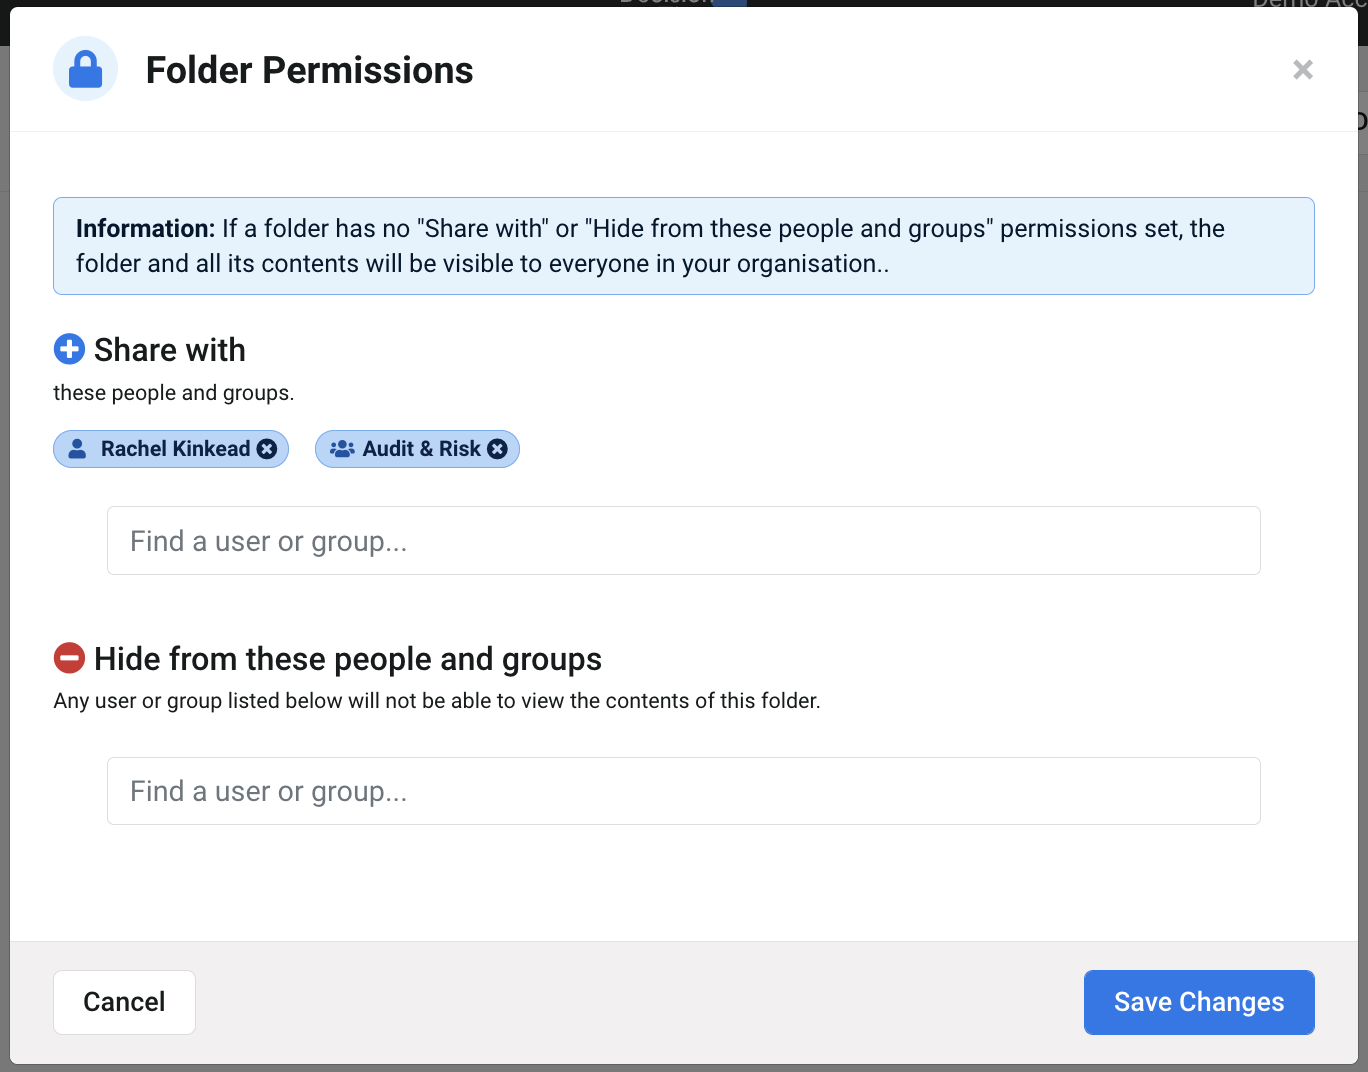
Now, decide whether 'Share with' or 'Hide from' is the more appropriate option. The permissions should be easy to manage, so if you only want to share the folder with a specific group (e.g. HR), or a small number of users, choose the 'Share with' option. Likewise, if you only need to restrict the folder from a few users, choose the 'Hide from' option. You don't need to apply both sets of permissions i.e. if you share the folder with specific users or a group, only those users can access it.
In this example, I've chosen to share the folder with the Audit & Risk Group. This means only members of that group will be able to view and access the folder.

Click Save Changes to apply the permissions.
Permissions can be updated in the same way, for example if another user needs access to the folder, click on the Permissions icon in the folder (remember to select Edit Mode first) and select the user's name in the Share With field. Click Save Changes to apply the updated permissions.
Troubleshooting
If a user can't access the Resources Library or see a folder they're expecting to, there are some things to check:
- Do they have access to the Resources Library as part of their User profile? A System Administrator can check this via Menu > Administration > Users.
- Have permissions been applied to the folder this User is expecting to see? Perhaps the user hasn't been included, or they have been excluded.
- If it's a sub-folder, check for permissions applied to the top level folder (these apply to any sub-folders too).
- Has the folder been shared with a Group? Perhaps that user is not a member. A System Administrator can check and manage Group membership via Menu > Administration > Groups.
Was this article useful?
Uploading