eSignature - how to request & add a signature
How to request and submit a signature on a document.

Updated
by Rachel Kinkead
Request a Signature
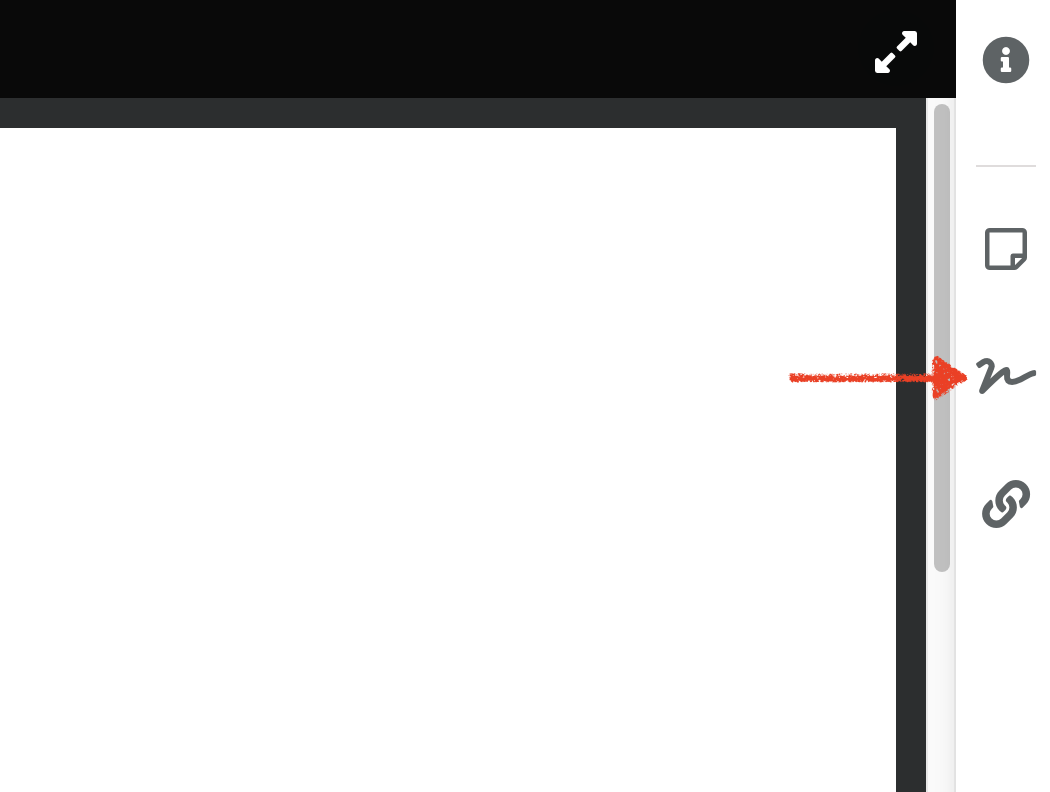
- Open the required document in the Meeting or Resources Library.
- Navigate to the page where the signature will be applied.
- Select the Signature icon from the menu bar on the right.
- Select Request Signature.
- Enter details of the request in the Reason for Signature Request field.
- Select the name of the person who needs to add the signature from the dropdown list under Assigned to.
- If others need to be able to view the signature on the document, select the group/names under Select who can view this.
- Once the signature request form has been completed, select Request Signature.
- Once the signature request appears in the document menu, select the pin icon.
- Move your cursor to where the signature should be added to the document and select to release the pin.
- A notification will be sent to the user who needs to add their signature.
Add your Signature
- A notification email will be sent to the user who needs to add their signature.
Signature requests are sent via email but this will also display in the Notifications pane on the Home screen.
- Select the link to open the signature request.
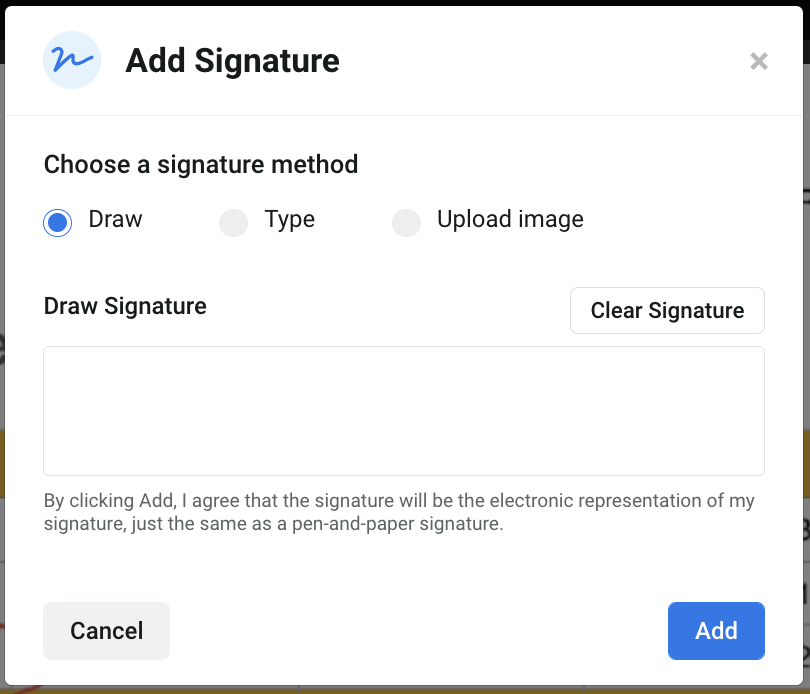
- Choose the appropriate signature method by selecting Draw, Type or Upload Image.
- Enter or upload the signature according to the chosen method.
- To reset, select Clear Signature.
- Select Add to save and apply the signature.
- The system will remember your signature if you are requested to sign in future.
Was this article useful?
Document Progress
Approvals & Resolutions
