Customise Access
Configuring & maintaining access restrictions using the Customise Access function. Standard access to a Risk Register is defined by the role - Administrator or User. An Administrator has access to an…
Configuring & maintaining access restrictions using the Customise Access function.
Standard access to a Risk Register is defined by the role - Administrator or User. An Administrator has access to and can edit any risk, regardless of ownership. Users have read-only access to all risks, but can only make changes on those where they're assigned as an owner or editor.
The Customise Access function allows named System Administrators to configure access restrictions to limit risk users' access to only the group(s) of risks they need visibility of. For example, a user might need access to IT related risks, but not Health & Safety risks.
These customised risk 'views' are created using your existing filters, and defined by the users included in each view. Customised Access is not a requirement, but if it's right for your organisation, nominated System Administrators can set up and maintain the restrictions by following the steps in this article.
Setting up Customised Access
Navigate to Menu > Administration > Users and click on the applicable Risk Register to display its user list. Click on the Customise Access button and select Add Custom View.

This will open the configuration screen where you can start setting up the custom view.
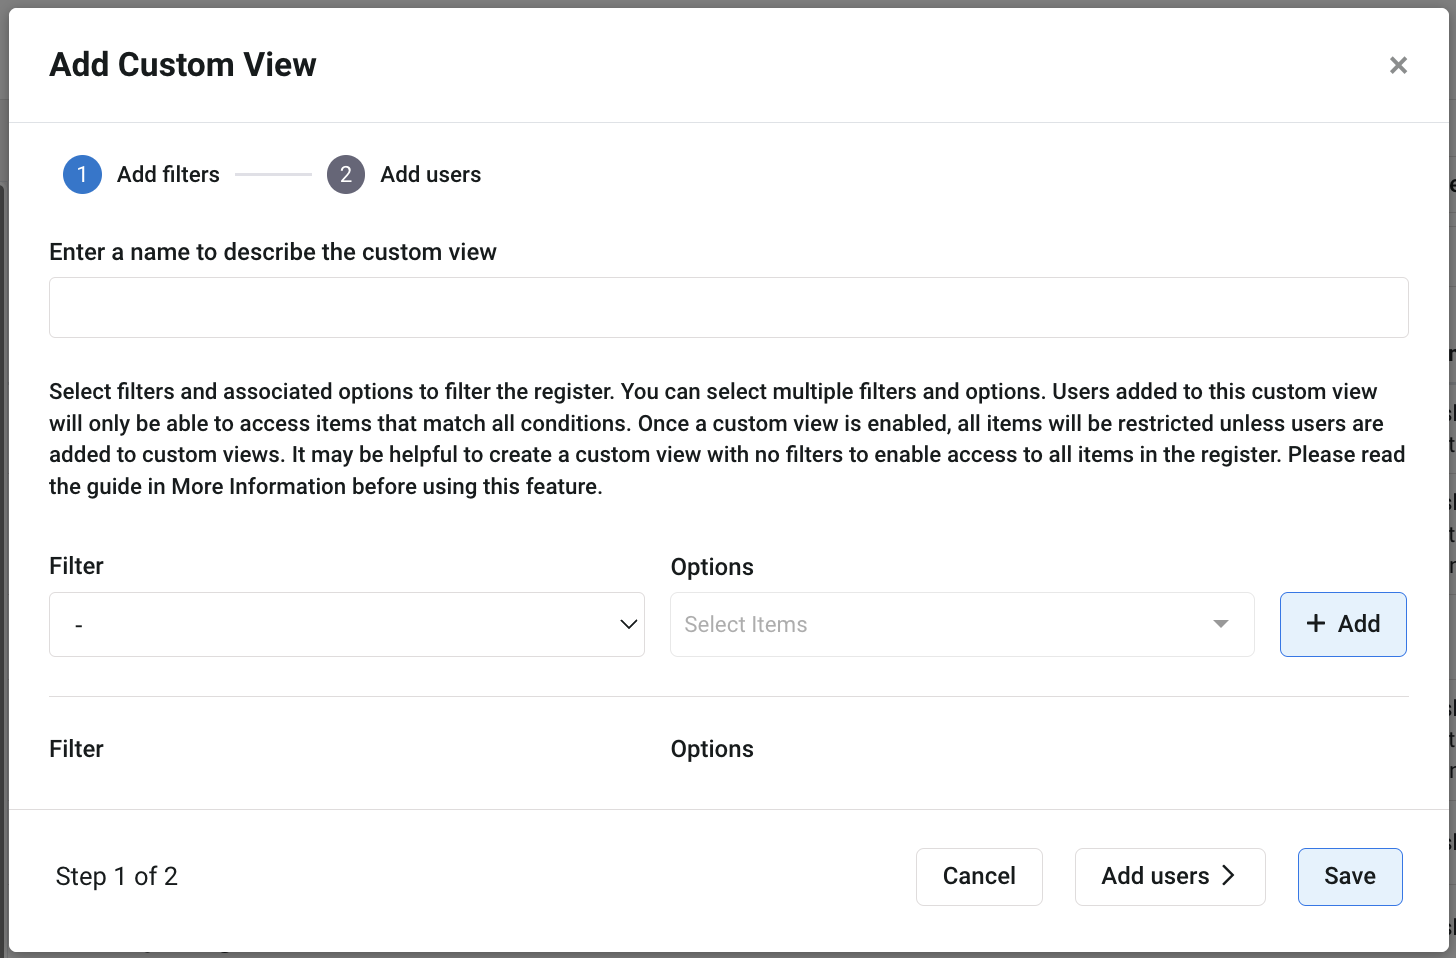
Give the custom view a name applicable to the access it provides (e.g. Information Security Risks).
Next, choose the filter applicable to the custom access using the Filter dropdown list. For example you might have a 'Department' filter for the different areas of your Organisation.
Use the Options dropdown to choose any filter item(s) applicable to the view e.g. risks tagged with 'Information Security' and 'Data Protection'. This is a multi-select field, so you can choose more than one option.
Click the +Add button then repeat this process for each filter needed (if there will be more than one applicable to that access).
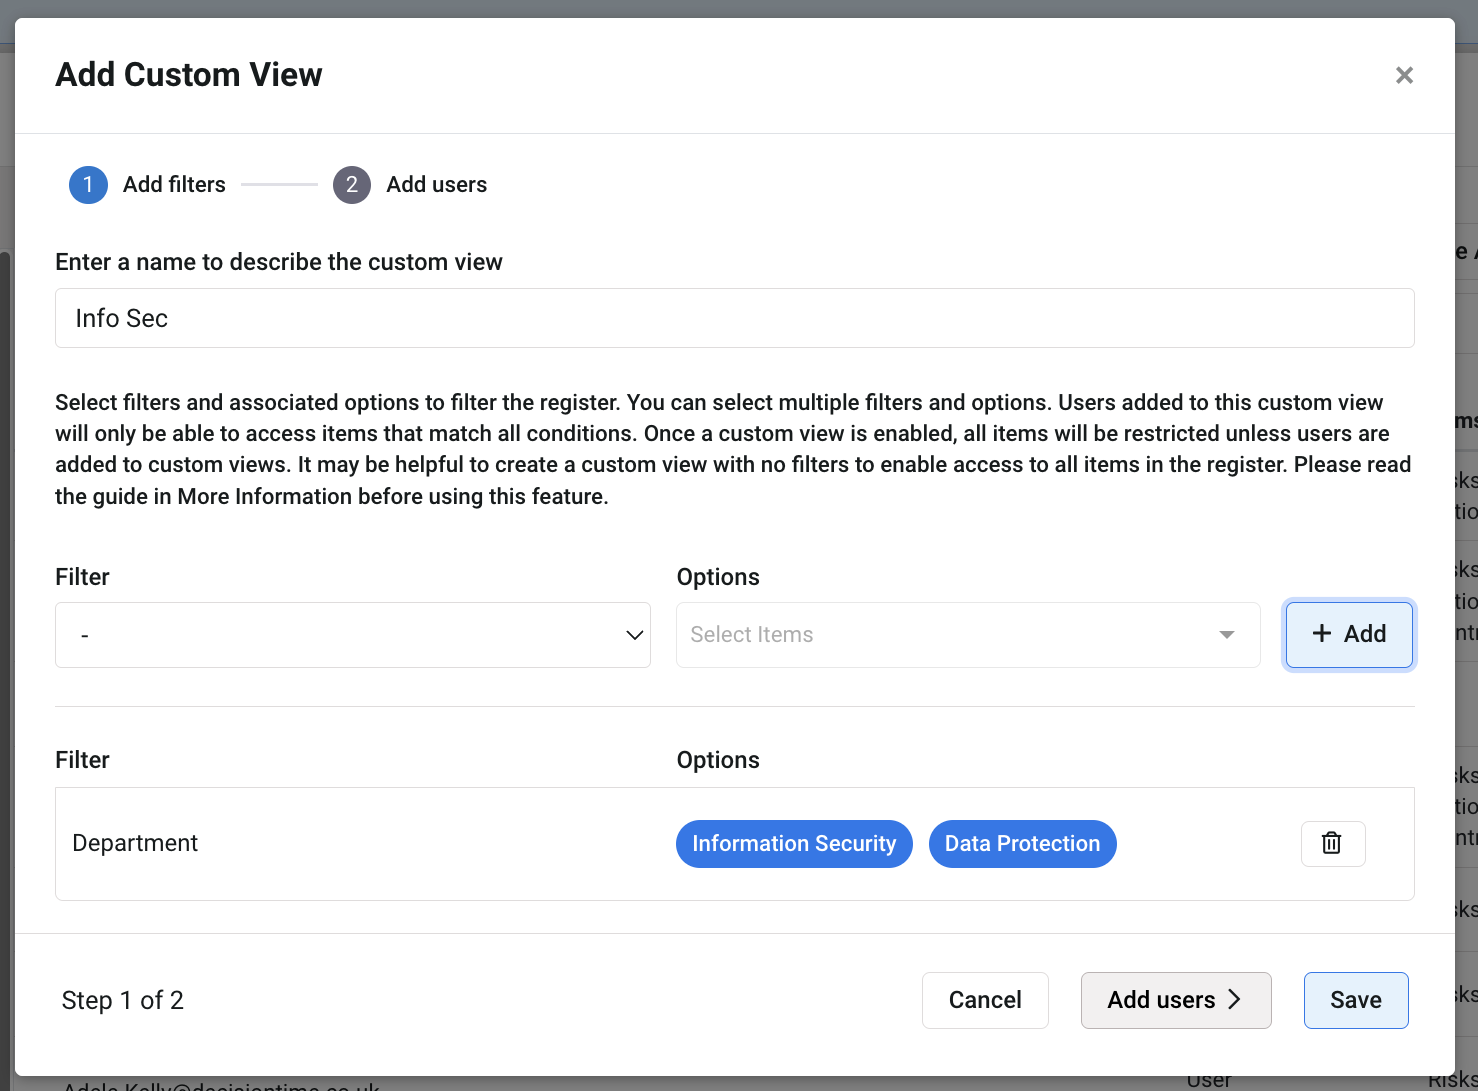
Click Add Users to move to the next screen and choose who will have this custom access applied.
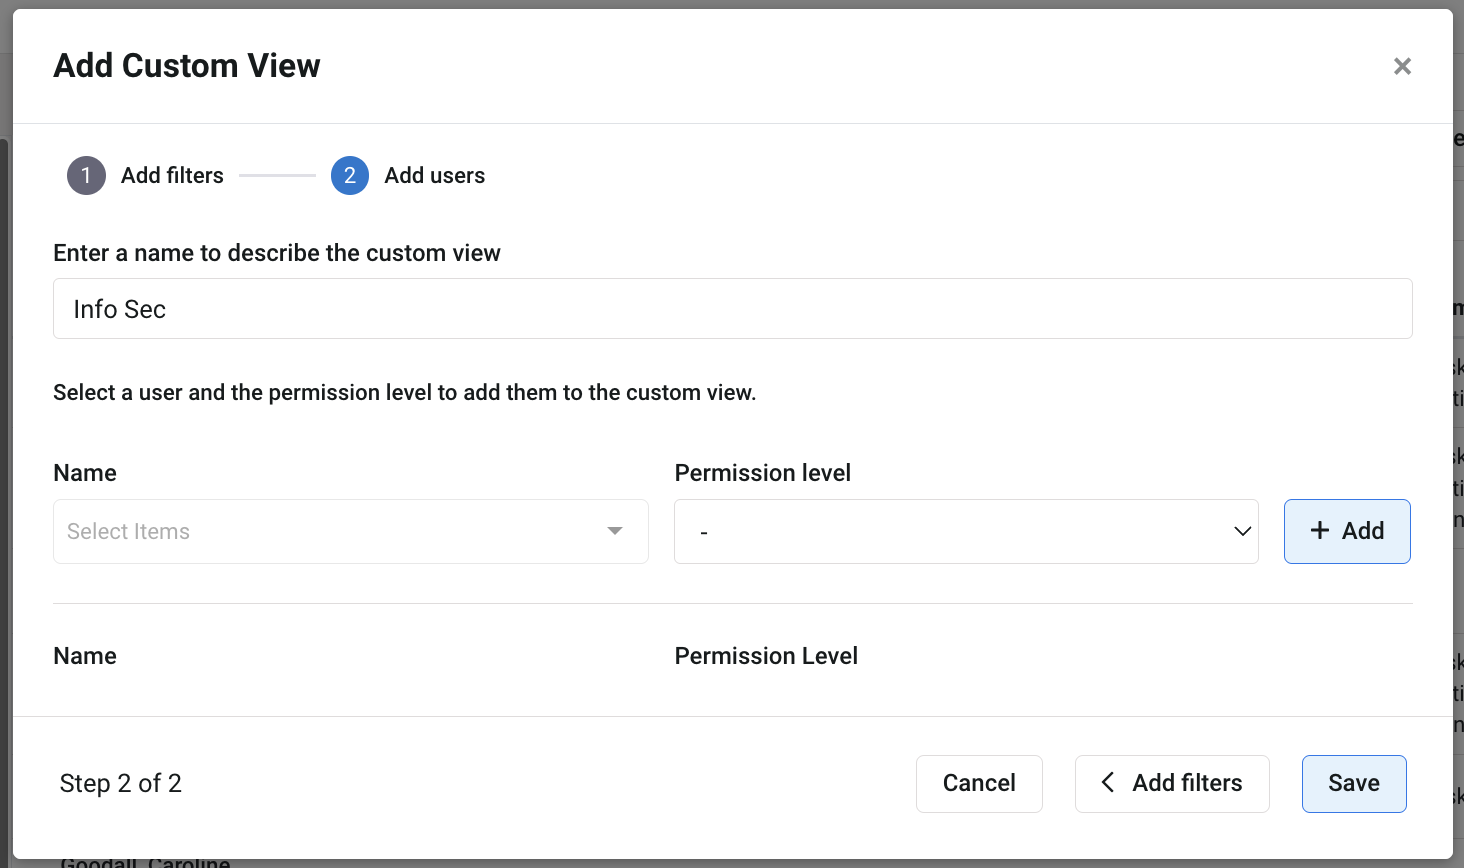
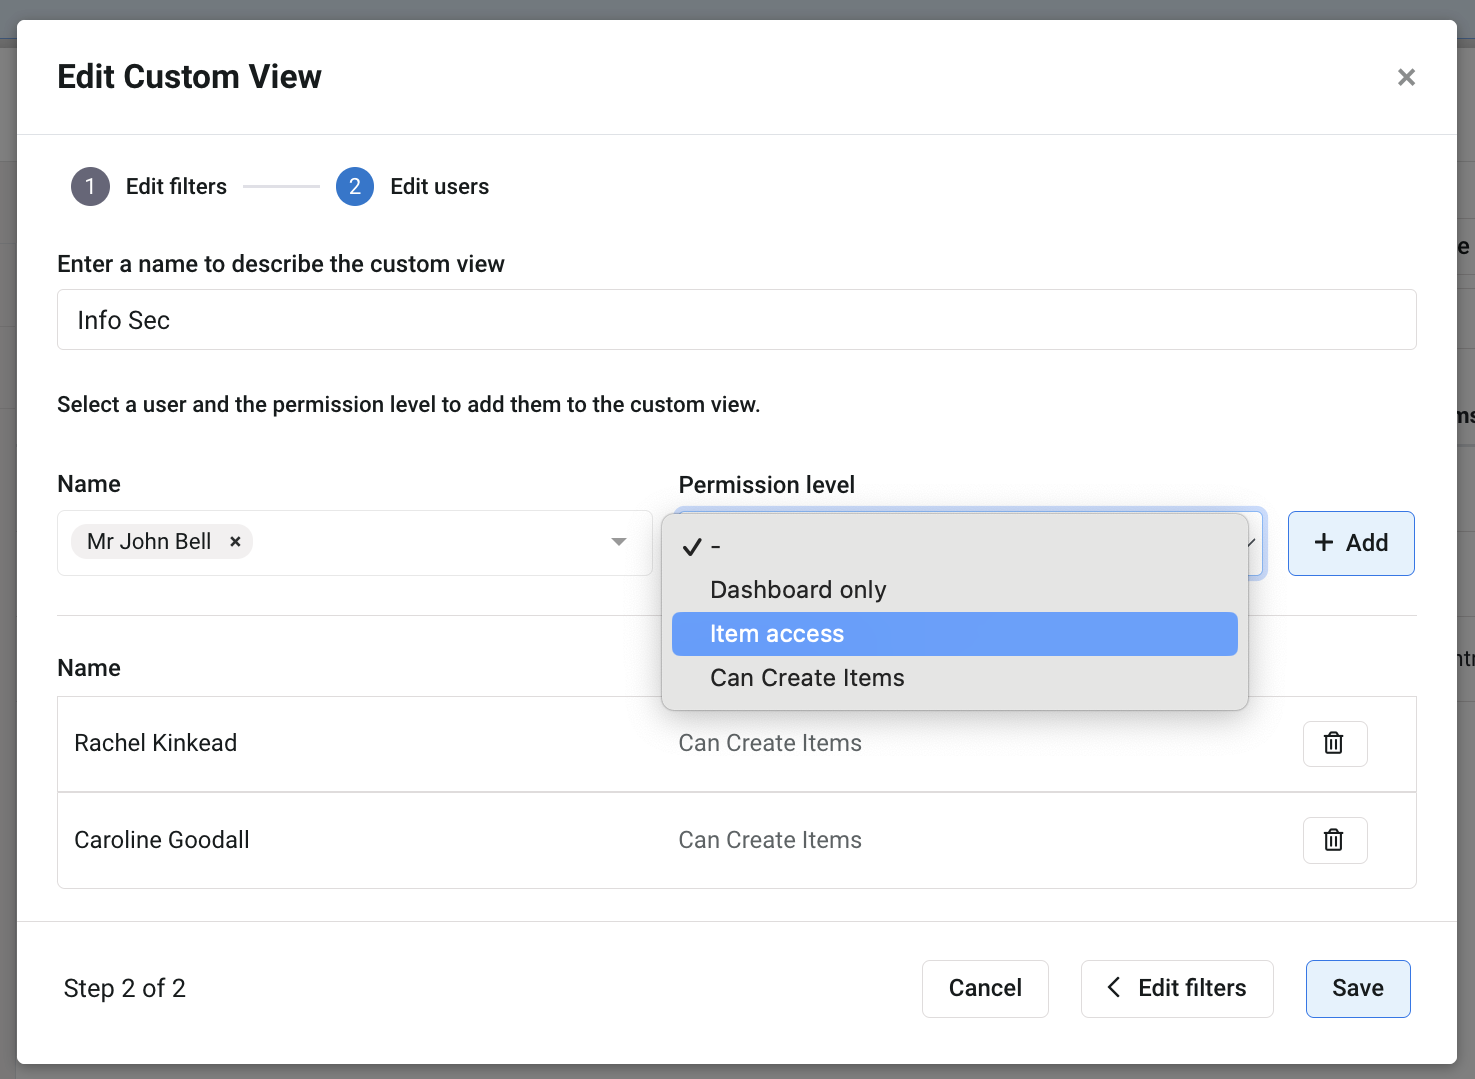
Use the Name dropdown to select each user for that risk register who will need this custom access.
You will need to select a Permission Level for each user. Choose from the following:
- Can create items - the user can add a new risk under that view, which they will be able to edit provided they are an owner or editor on it.
- Item access - the user can access the risks under that view, but can only edit anything they've been assigned as an owner or editor of. They will not be able to add new risks.
- Dashboard view - this is the most limited access as the user can only view the main dashboard screen but can't click into a specific risk.
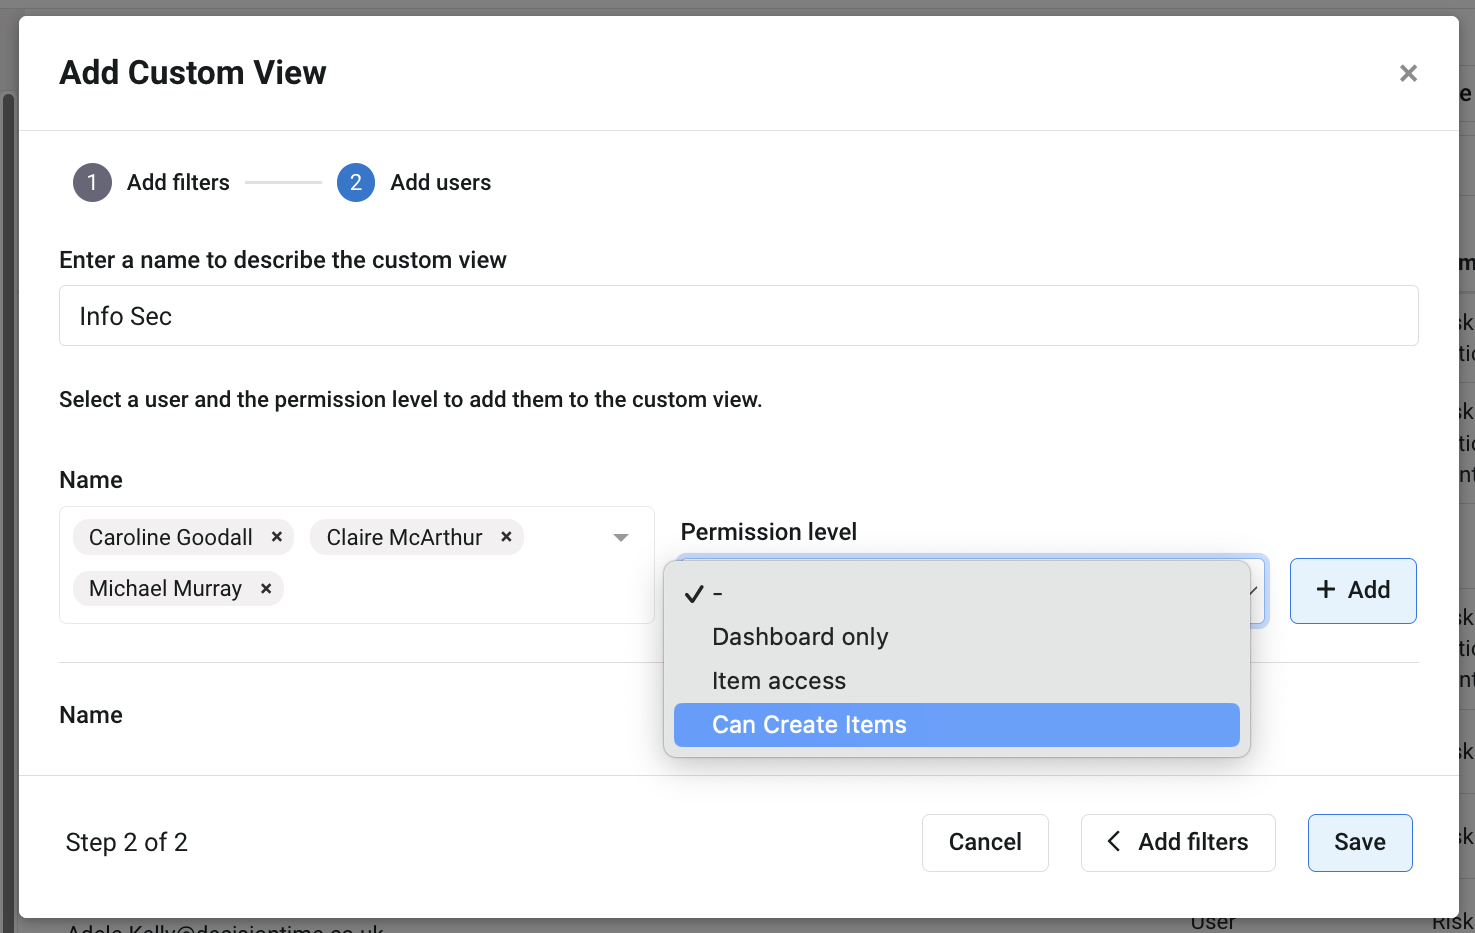
Once you have included the applicable users to this custom access, and chosen the permission level each will need, click Save to apply your configuration.
Setting up an 'All Risks' view
Example: some users only need access to the 'Environmental' risks on the register and nothing else. You create a custom access configuration for 'Environmental Risks' and include the users who need that limited access. At this point it's the only restriction you want to apply for now, and the other users still need the same access as before.
Click on the Customise Access button and select Add Custom View.
Give the view a name e.g. 'All Risks'
Where previously you would have selected a filter and any applicable options under it, this time, leave these fields blank. This means all the risks are included in the access, as you're not restricting by specific filters.
Click Add Users to choose who will have the 'All Risks' access.
Use the Name dropdown to select each user for that risk register who will need this custom access.
You will need to select a Permission Level for each user. Choose from the following:
- Can create items - the user can add a new risk under that view, which they will be able to edit provided they are an owner or editor on it.
- Item access - the user can view the risks under that view, but can only edit any items they've been assigned as an owner or editor of. They will not be able to add new risks.
- Dashboard view - this is the most limited access as the user can only view the main dashboard screen but can't click into a specific risk.
Once you have selected the users who need the 'All Risks' access, and chosen their appropriate permission level, click +Add to apply each configuration, then Save when you're finished.
An 'All Risks' view is useful for risk Administrators as it means they can access all the risks on the register and make changes where they need to.
Editing Custom Access
If you need to make a change to an existing Custom Access configuration, e.g. including or removing users or filter options, you can do so via the following steps.
Navigate to Menu > Administration > Users and click on the applicable Risk Register to display the user list. Click on the Customise Access button and select Edit Custom View.
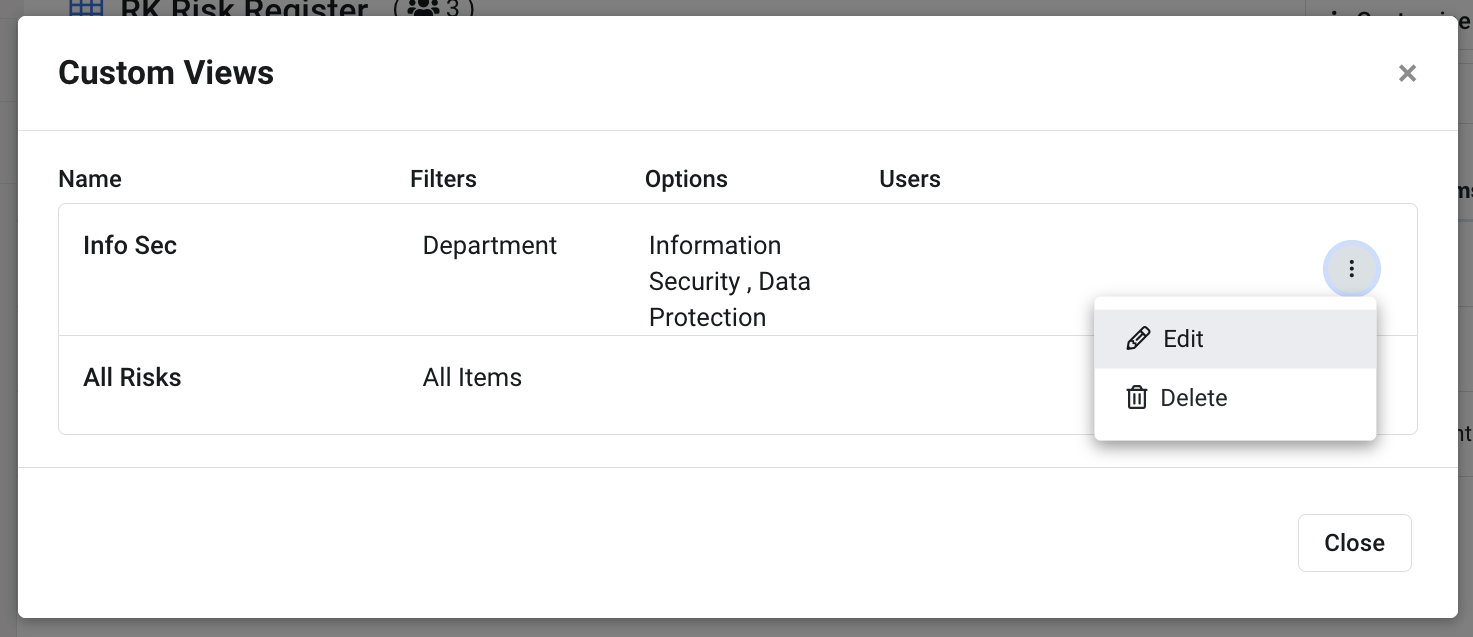
You'll see your existing configurations listed. Click on the 3 dots icon beside the one you want to update and select Edit.
Make the necessary updates e.g. add a user to the custom view, include another filter option, rename the custom view, or remove a user from having that access. Click +Add to apply your updates, then Save when you're finished making changes.
Troubleshooting
I added a new user to the Risk Register, but they can't access it.
Have you applied the custom access they need? Even if they need access to all risks, when custom access is in place at all, a 'view' must be applied in order for the user to be able to access the risk register.
Can users have more than one view?
Yes, it's possible to apply more than one risk view when users need access to different departmental risks, but All Risks is not an appropriate option. If more than one view is applied for a user, they will be able to switch using a dropdown at the top of their screen.
Was this article useful?